
An independent guide
Order of the Sinking Star Walkthrough
From the Crossroads in the full game of Order of the Sinking Star, take the eastern route to the Mirror Isles. In its opening sub-region, solve the four first-island rooms, use the hub mirror to reach the eastern pair, then rewind the hub mirror and reflect south for the last pair. After all eight rooms, use the new hub stone and mirror to reach the next sub-region. This walkthrough gives that bounded route, with the initial room arrangements and ordered moves; it does not cover every puzzle or the story ending.
- Route
- Crossroads → Mirror Isles opening sub-region → entrance to the next sub-region.
- Version
- Full-game launch-period original guides and creator footage, October 7–8, 2026; exact patch unspecified. Historical June demo instructions are separate.
- Numbering
- Puzzles 1–8 below follow the original guide’s opening-region order, not a universal official level ID.
Start at the Crossroads and choose the eastern route
This walkthrough starts after the tutorial, at the Crossroads, and follows the first Mirror Isles sub-region. Collect the map above the Crossroads, then take the eastern path. The island hub is recognizable by its large Mirror Isles lettering and the group of four puzzle flowers.
The puzzle numbers below are the opening-region sequence used by Mehrdad Khayyat’s guide, rather than a claim about an official global numbering system. Start each room from its initial arrangement. Use screen-left, screen-right, up and down for the move directions; a numbered move counts grid squares.
Choose another initial world if you want a different rule set. This is a location guide, not a compulsory play order.
Scroll across to read every column.
| From the Crossroads | World | What identifies it |
|---|---|---|
| North | The Hearty Heroes of Hauling | A team with different object-moving abilities. |
| East | The Mirror Isles | Islands, movable mirrors and reflected positions. |
| South | Skipping Stones to Lonely Homes | Stones and lily pads crossing water. |
| West | Vault of the Beamcasters | Caverns and colored beams that grant abilities. |
For a world-level location lookup, use the world and region index. The northern and eastern routes are the beginner guide’s suggested starting choices; you are free to choose another path.
Sources: GameRant — Order of the Sinking Star walkthrough hub · GameRant — Mehrdad Khayyat, Mirror Isles Part 1 · Into Indie Games — Mahmud Munazil Rahman’s beginner guide · Arc Games — Fero, Explore the Realm
Read the reflection before moving
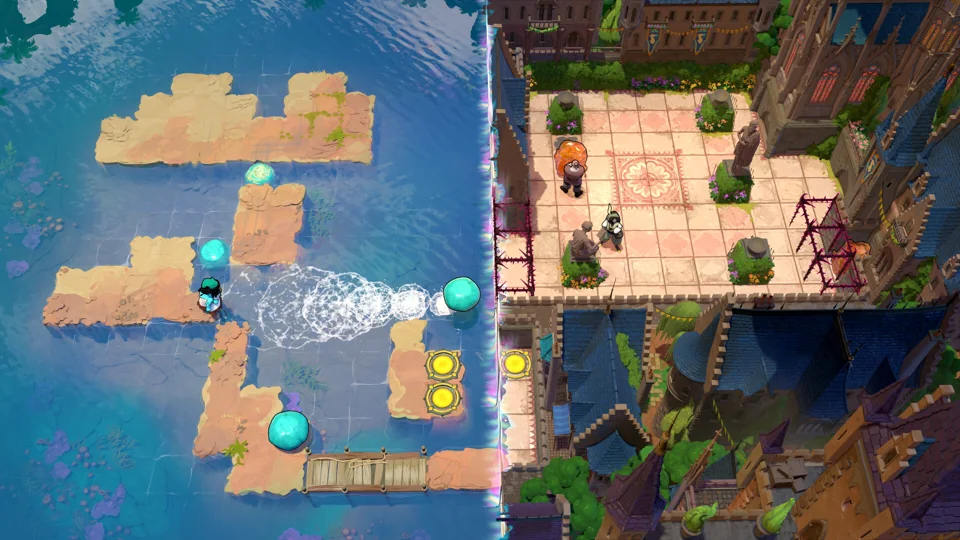
In these rooms, your goal is the yellow circular pad. Activate a mirror when your reflected position is on the island you need; you do not walk across the water between those islands. Moving farther from a mirror can move the reflection farther away.
You can push these mirrors, but you cannot pull them back. Before pushing one against an edge, check that you will still be able to reach its other side. If your objects no longer match a step’s starting position, use Undo or restart the room before applying the move counts. The controls reference separates the reported PC defaults from other layouts.
Sources: GameRant — Mehrdad Khayyat, Mirror Isles Part 1 · Arc Games — Fero, Explore the Realm · Into Indie Games — Mahmud Munazil Rahman’s beginner guide
Puzzle 1 — reach the southern island
Identify the room by four separate green islands: the mirror is on the upper-right island and the yellow goal is on the lower island.
Reflect to the upper-left island
Activate the mirror to leave the starting island.
Extend the reflected position south
Walk to the leftmost square of the upper-left island. Your reflection now reaches the lower island.
Land and finish
Activate the mirror again, then walk onto the yellow pad.
Completion signal: The Trader stands on the southern goal; return to the island hub for Puzzle 2.
Sources: GameRant — Mehrdad Khayyat, Mirror Isles Part 1 · Gamer Guru — Mirror Isles puzzle recording
Puzzle 2 — move two mirrors
This room has a small northern starting island, a larger island below-left with a second mirror, and the goal island on the right.
Reposition the northern mirror
Push it to the left edge of its island. Walk right along the same row until your reflection is on the lower-left island, then activate the mirror.
Adjust the second mirror
Push the mirror on that lower-left island up two squares. Walk down to the bottom square in the same column.
Cross to the goal
When the reflection reaches the right-hand goal island, activate the mirror and step onto the yellow pad.
Completion signal: The Trader occupies the right-hand goal.
Sources: GameRant — Mehrdad Khayyat, Mirror Isles Part 1 · Gamer Guru — Mirror Isles puzzle recording
Puzzle 3 — carry the mirror across stone bridges
Look for five islands: a southern starting island with one stone, a central island, a western mirror island, two stones on the northern island, and the goal island to the east.
Make the first crossing
Push the southern stone right one square, then up three squares into the water. Cross it to the central island.
Reach the northern stones
From the central island’s leftmost square, reflect to the western mirror island. Push that mirror up four squares; walk down until the reflection reaches the northern island, then reflect there.
Build two bridge links
Push the northern island’s left stone down into the water. Move its other stone left two squares, down seven, then left four. These stones connect the northern, central and western islands.
Bring the mirror to the center
Cross back to the western island and push the mirror over the bridge to the central island. Leave it on the central island’s rightmost square.
Reflect from the south
Walk onto the southern island in the mirror’s column. Activate it when your reflection is on the eastern island, then take the yellow pad.
Completion signal: The Trader is on the eastern goal, with the mirror on the central island.
Puzzle 4 — use a submerged stone as a standing square
This room has one mirror, one movable stone and a goal on the separated island to the left.
Reach the stone
Push the mirror right two squares. Walk left until your reflection reaches the upper part of the room, then activate the mirror.
Create the standing square
Push the stone left one square, up two, then left into the water.
Use the new square
Stand on the submerged stone and activate the mirror when the reflection reaches the island with the yellow pad. Walk onto the pad.
Completion signal: The goal is on the left-hand island in the original capture.
Hub crossing after Puzzle 4 — open the eastern pair
Lift the hub mirror
On returning to the Mirror Isles hub after the first four rooms, push the newly available mirror up two squares.
Reflect from the bottom of its column
Walk back down that column and activate the mirror to reach the eastern island.
Completion signal: You can now enter the flowers for Puzzles 5 and 6.
Puzzle 5 — extend a bridge to carry the mirror
The goal is on the right-hand island. You need to bring the mirror around the lower islands rather than trying to reflect directly from its starting position.
Move the mirror west
Push the starting stone down one square and left two into the water. Push the mirror down one and left five over that bridge. Walk right until you can reflect to the lower island.
Add a branch to the bridge
On the lower island, push the upper of its two stones up into the water. Bring the remaining stone into that column and push it up over the first, joining the earlier bridge.
Carry the mirror down
Return to the mirror and push it down one square, right two, then down four. Go around to its front and push it up two.
Reflect to the right-hand goal
Walk to the bottom square of this island, activate the mirror and step onto the yellow pad.
Completion signal: The mirror is between the upper stones and lower island; the Trader reaches the right-hand goal.
Puzzle 6 — put the mirror on the outer stone
The upper starting island has two stones. The mirror is on a long lower island, and the goal sits on the isolated island at upper-left.
Make a two-stone approach
Push the right stone left four squares, then down into the water in the mirror’s column. Move the other stone into that column and push it down over the first stone. Stand on the second stone and reflect to the right end of the lower island.
Build the outer foothold
Move each of the lower island’s two stones to its leftmost square, then push each left into the water.
Set the mirror on the far stone
Push the mirror right one square, up one, then left onto the outermost submerged stone.
Reach the remaining island
Walk right along the lower island until your reflection reaches the goal island. Activate the mirror and walk onto the yellow pad.
Completion signal: The Trader is on the isolated upper-left goal.
Hub crossing after Puzzle 6 — reach the southern pair
Restore the hub mirror’s starting position
Back in the hub, use Undo to return the western hub mirror to its original position with the Queen on that island. The original guide uses held Z on PC for this hub rewind; follow the Undo action shown by your own controls.
Use the newly opened square
Push the hub mirror up only one square. Walk south and reflect to the eastern island.
Take the southern reflection
Walk to the eastern island’s right end along the same row. Collect the map there and activate the reflection to the southern island.
Completion signal: The southern flowers for Puzzles 7 and 8 are now reachable.
Puzzle 7 — get behind the stone to finish the bridge
There is a starting stone, a mirror on the upper island, another stone to move south, and the goal island on the right.
Reach the upper island
Push the starting stone up two squares into the water and cross the new bridge. Push the mirror up one square and left one into its corner position.
Move the second stone south
Push the other stone down two squares, left two, then down three. It reaches the southern island.
Approach the correct side
Return to the upper island and stand in the mirror’s row. Activate it to arrive on the left side of the southern stone.
Complete the last bridge
Push that stone right into the water, cross to the eastern island and stand on the yellow pad.
Completion signal: The final stone connects the southern island to the right-hand goal island.
Puzzle 8 — move the mirror around the narrow strip
Look for a long upper landmass with a narrow horizontal strip joining its two ends. The starting mirror and one stone are at the right end; another stone is at upper-left. The goal is on a detached island at lower-left.
Make room around the mirror
Push the mirror right one square. Push the nearby stone right two and up one into the water, making space to get around the mirror.
Bring the mirror onto the strip
Push the mirror down one square and left four. Leave it there. Move the other stone right three and down four into the water.
Reach the left side through the reflection
Return to the mirror. Push it down one square and left five, then activate it to land on the stone you submerged.
Aim for the final island
Push the mirror up three squares and left four. Walk right along its row until your reflection reaches the lower-left goal island. Activate the mirror and walk onto the yellow pad.
Completion signal: The original author’s clip ends with the Trader on the lower-left goal at about 88 seconds.
Last hub crossing — enter the next sub-region
Move the newly available stone
After returning to the hub, a mirror and a stone are available on the southern island. Push the stone right one square.
Get behind it
Stand in front of the mirror and activate it to reach the other side of the stone. Push the stone down into the water.
Take the reflection onward
Return to the mirror and push it right one square. Stand on the submerged stone and activate the mirror.
Completion signal: You reach the next sub-region. This is the endpoint of the covered route, rather than the end of the Mirror Isles campaign or the game.
Stop here if you want to continue discovering the next rooms yourself. For later combined-world room identification, use dragon puzzle help when it matches your board; the world index explains the larger connections without giving later story outcomes.
Sources and scope
- Arc Games — Fero, Explore the Realm
September 23, 2026 official explanation of the four routes and reflection logic; its western name was The Promise.
Research checked
- GameRant — Order of the Sinking Star walkthrough hub
Original launch-period text: tutorial topics, Crossroads map and initial-world directions; hub is still being expanded.
Research checked
- Into Indie Games — Mahmud Munazil Rahman’s beginner guide
October 8, 2026 original guide: current world names, choice of route and returning to the overworld.
Research checked
- GameRant — Mehrdad Khayyat, Mirror Isles Part 1
October 7, 2026 original instructions, actual author captures and native Puzzle 8 clip; eight opening-region rooms and three hub crossings. Exact patch unspecified.
Research checked
- Gamer Guru — Mirror Isles puzzle recording
October 7, 2026 creator recording; actual frames viewed for rooms 1–3, goals accepted for 1–2. Later retrieval returned a player error, so further rooms use the original written guide and its actual pictures.
Research checked