
An independent guide
Order of the Sinking Star Demo Walkthrough
In the June Steam demo of Order of the Sinking Star, head north to the Hearty Heroes of Hauling entrance to begin the Warrior's opening course. Clear the first corridor, work clockwise through the six-chamber room, hold the single flower button with a crystal, then fill all three buttons in the last room to open its exit. The written route below ends when the Warrior leaves that room and the recording returns to the world entrance. It covers these four opening rooms, not every puzzle in the expanded demo.
- Build
- Historical Steam Next Fest demo footage. PairingPears identifies June 15 and June 19, 2026 builds; the exact build used for each edited room is not specified.
- Route
- Northern world entrance → four opening Warrior rooms → return to the world entrance. Room labels below are descriptive, not official level IDs.
- Applicability
- Match the starting board before following the moves. These are June demo instructions, not confirmation that a current full-game room is identical.
Match the June demo and the four covered rooms
The public Steam demo began on June 15, 2026 and received extra content on June 19. Its official FAQ described around 110 levels plus parts of the overworld, with three initial worlds and later content combining their rules. The announced availability window was extended to June 26 at 10am PT. Those dates describe the historical demo; use the demo information page for availability rather than treating this route as a download offer.
The route uses the red-clad Warrior. He can push a line of crystals together, which is essential in the six-chamber and three-button rooms. If you are controlling the green Thief or the Wizard, you are on another course even when the architecture looks similar.
Find your current room in the covered Warrior course.
Scroll across to read every column.
| Visible arrangement | Written solution | Completion signal |
|---|---|---|
| Long corridor; blue crystal, pink crystal and two stone pillars | Clear the corridor | Warrior reaches the yellow circular goal |
| Six small chambers in two rows, joined by narrow passages | Cross the six chambers | Warrior stands on the lower-left green portal |
| One pink crystal, a left flower button and a right yellow barrier | Hold the single button | Barrier opens and the right green portal is reached |
| Three crystals, central thorns and three flower buttons along the bottom | Fill all three buttons | Right exit opens; Warrior reaches the purple exit marker |
Sources: Arc Games / Thekla — Steam Next Fest demo announcement and FAQ · Arc Games / Thekla — demo availability extension · PairingPears — Next Fest Demo Full Walkthrough
Enter the northern course
From the Crossroads, follow the northern castle route to the courtyard with THE HEARTY HEROES OF HAULING written across its floor. Enter through the doorway at the top of that courtyard. In the June recording, the Queen becomes the Warrior inside the opening corridor.
Left, right, up and down below mean the directions on the shown overhead board. Start each room with its original crystal positions. If an earlier experiment has changed the arrangement, undo it or restart that room before following a sequence.
Room 1 — clear the corridor beneath the pillars
Identify the narrow three-row corridor: the Warrior starts on the left, a blue crystal blocks the lower passage near the first stone pillar, and a pink crystal sits beyond the second pillar. The yellow circular goal is on the right. The useful hint is to clear the lower route first, then approach the last crystal from its left.
Open the lower passage
Approach the blue crystal from the left and push it right along the bottom row until you can pass beneath the first pillar and walk up into the central open space.
Use the upper route
Walk around the upper side of the second pillar. Approach the pink crystal from its left and push it right, leaving the square above the goal clear.
Reach the goal
Walk down onto the yellow circle beside the right wall.
Completion signal: The Warrior occupies the goal and the next room loads. In PairingPears' recording this position is visible at about 5:02.
Room 2 — cross the six chambers clockwise
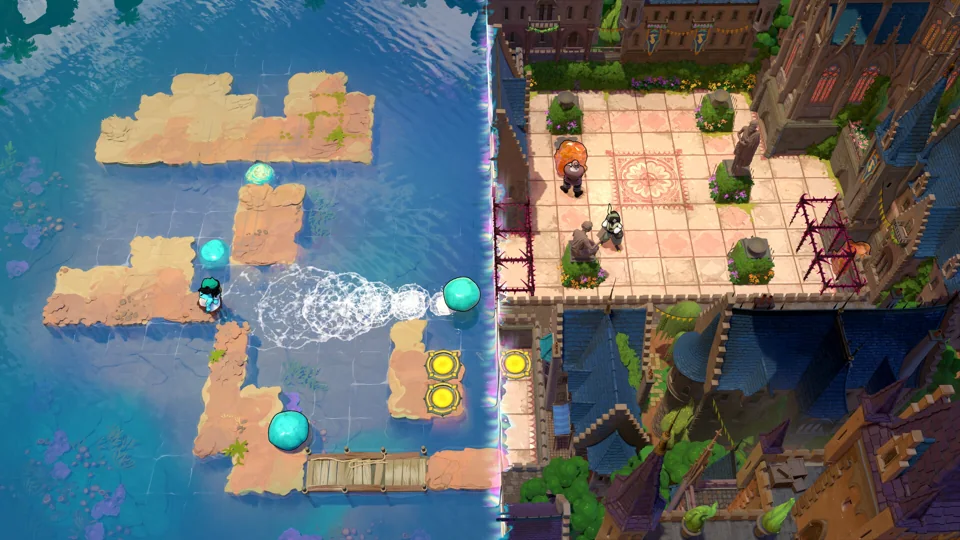
This room has three chambers across the top and three across the bottom. You enter at the upper left; the green portal is in the lower-left chamber. Crystals block the connections, so take the upper route to the right, descend, then work left along the lower row. The Warrior can push the connected crystal row together; you do not need to move each crystal separately.
Enter the upper-middle chamber
From the upper-left chamber, push the pink-and-blue crystal line right once through the first passage. Walk above the blue crystal and push it down one square, clearing the upper-middle chamber's route to the right.
Descend on the right
Walk into the upper-right chamber and use its downward passage. Push the pink crystal in that passage down into the lower-right chamber so you can follow it.
Open the lower route
Get to the right of the crystal row crossing the lower chambers. Push the row left through the narrow connection until you can enter the lower-middle chamber. Use its clear upper row to get above the crystal blocking its left-hand route, then push that crystal down into the chamber's bottom row.
Clear the portal
Walk left into the lower-left chamber and push its horizontal crystal line left until the blue crystal reaches the left edge. The pink crystal is now on the green portal. Walk below the pink crystal and push it up one square.
Step onto the exposed portal
Move onto the green circle you just uncovered.
Completion signal: The portal changes as the Warrior stands on it, and the single-button room follows. The accepted portal state is visible around 5:21–5:22 in the recording.
The covered route ends at the world entrance
The open three-button exit and return to the Hearty Heroes courtyard mark the end of this Warrior course. They do not mark completion of the entire June demo. The same recording next enters a green-clad Thief course, whose pulling ability requires different moves even in familiar-looking rooms.
The northern course is a starting route, not a compulsory order for all worlds. The developer's June announcement described a non-linear overworld and allowed players to come and go between its available worlds.
Sources: PairingPears — Next Fest Demo Full Walkthrough · Arc Games / Thekla — Steam Next Fest demo announcement and FAQ
Find the remaining areas in the June recording
PairingPears' own chapter labels in the edited June demo recording. These links locate footage; they do not claim written solutions for all remaining rooms or measure your play time.
Scroll across to read every column.
| Recorded area | Video position | How to use it |
|---|---|---|
| Hearty Heroes / later northern courses | 4:23 | Opening northern area; the four Warrior rooms are written above |
| Mirror Isles | 1:31:51 | Historical eastern mirror boards |
| The Promise | 2:31:10 | The western name used in this June footage; do not assume current full-game layouts match |
| Heroes 3 — Druid | 3:21:15 | Later northern character puzzles |
| Heroes 3 — Bard | 3:36:00 | Another later northern course |
| More Mirror Isles | 3:43:30 | Additional eastern footage |
| North East | 4:14:11 | Creator's label for later combination content |
These are remaining branches beyond this written starter route. The June 19 update added content where worlds combine, but the supplied evidence does not establish that you must complete every earlier area in the recording's order to reach it.
For a different historical board with a fire dragon and two heroes, use the room identification in dragon puzzle help. For a current full-game opening route, use the separate Mirror Isles walkthrough. The demo duration page explains why an edited recording length and a player's completion time are different measures.
Sources: PairingPears — Next Fest Demo Full Walkthrough · Arc Games / Thekla — Steam Next Fest demo announcement and FAQ
Sources and scope
- Arc Games / Thekla — Steam Next Fest demo announcement and FAQ
June 2026 official Steam demo window, three initial worlds, around 110 levels and June 19 expansion. Its availability and build claims are historical.
Research checked
- Arc Games / Thekla — demo availability extension
June 22, 2026 official announcement extending the demo window to June 26 at 10am PT; not evidence of present availability.
Research checked
- PairingPears — Next Fest Demo Full Walkthrough
June 20, 2026 creator recording, described as June 15/19 demo builds. Actual decoded frames read for the four opening Warrior rooms and their endpoints; later area links use the original creator's chapter description. No hands-on game testing or all-demo completion verification is claimed.
Research checked